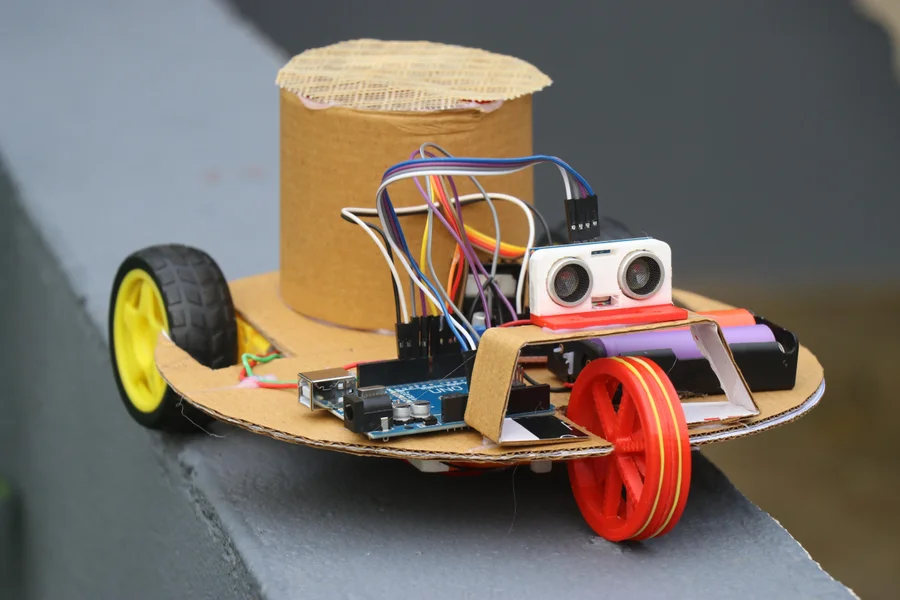
Welcome back to another captivating instructable. In this endeavor, I’ve crafted an Arduino-powered floor cleaner robot, which operates significantly quieter than typical models.
Yes, you heard that correctly! This is a straightforward yet fully operational dry floor cleaner capable of picking up items from the floor such as paper scraps, hair, foam fragments, leftover chips from a party, and much more!
Materials Needed
To replicate this project, I’ve listed all the necessary components that are easily accessible. Should you wish to construct this robot, I’ve provided detailed instructions in this guide, enabling anyone to assemble and enjoy the process.
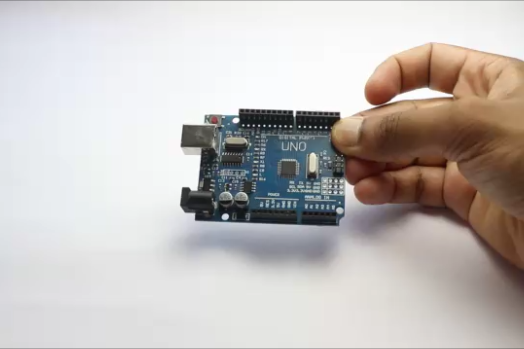
- Arduino Uno (Available on Amazon)
- Ultrasonic Sensor (HC-SR04)
- L298N Motor Driver Module
- DC fan, switch, and battery source
- Sturdy Cardboard
- Two BO Motors with wheels
- Two 18650 Batteries
- Battery Holder with Separate Switch
- Jumper Wires
- Paper glue
- Plastic wire mesh
- Spare wheel
- Piece of steel or toothpick
- Super glue and hot glue
- Soldering iron and wire
- Arduino IDE and programming cable
Please note that using Amazon affiliate links may provide me with a small commission at no extra cost to you, which helps support my projects.
How Does This Robot Operate?
The functionality of this robot is quite elementary. The board is programmed so that upon activation, the robot advances forward, with the HC-SR04 sensor scanning for obstacles. When an obstruction is detected, the robot halts, reverses, and then continues forward in a different direction. This cycle repeats, ensuring most floor areas are covered. During this process, the fan remains active, collecting debris from the floor.
To empty the collected debris, simply lift the robot, position it over a dustbin, and turn off the fan, causing the particles to drop out.
Step-by-Step Guide
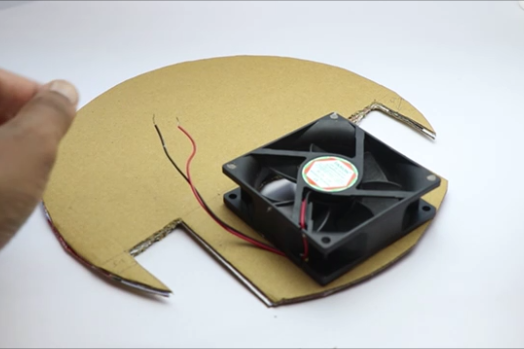
Step 1: Constructing the Frame
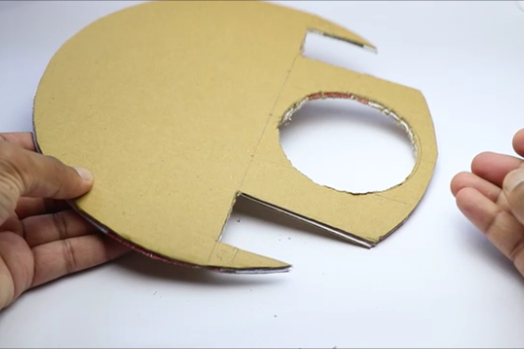
The frame is crucial as it houses all the electronics and mechanisms. Though cardboard might seem flimsy, using a recycled package container and reinforcing it with multiple layers provides sufficient strength. I crafted discs from the cardboard, adhered them with paper glue, and allowed them to dry thoroughly. Marking areas for the fan and wheels, I cut the base accordingly.
Step 2: Circuit Diagram and Codes
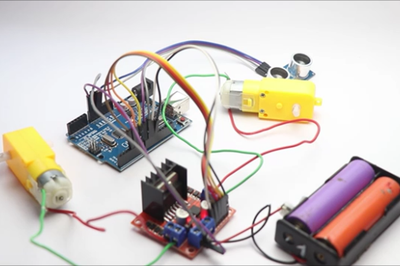
To simplify the circuit explanation:
- Ultrasonic Sensor:
- VCC to 5V on Arduino
- GND to GND on Arduino
- Trig to Pin 8 on Arduino
- Echo to Pin 9 on Arduino
- Arduino Uno Connection with Motor Driver and Battery:
- Vin pin to 5V pin of the driver
- GND to GND of driver
- 12V pin to positive pin of driver
- L298N Motor Driver Connections with Uno:
- IN1 to D4 on Arduino
- IN2 to D5
- IN3 to D6
- IN4 to D7
- ENA to D10 and ENB to pin D11
- GND to GND on Arduino
- VCC to Battery positive
- Motor 1 Outputs to Motor 1
- Motor 2 Outputs to Motor 2 Terminals
- Fan:
- The DC fan requires 12V for optimal performance. Using a 7.4V battery source, connect the battery to the fan and control it with a simple switch.
After assembling the circuit, connect the USB to Arduino, upload the code, then disconnect the USB.
Step 3: Suction Fan and Front Wheel
Install the DC fan, ensuring no obstacles hinder its operation. Attach the fan to the frame with glue. For movement, two BO motors control the robot, and an additional wheel installed at the front stabilizes it.
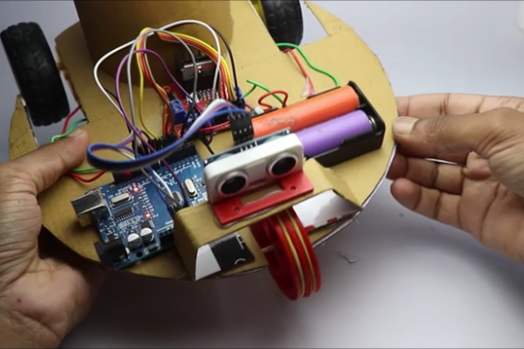
Step 4: Adding the Circuit
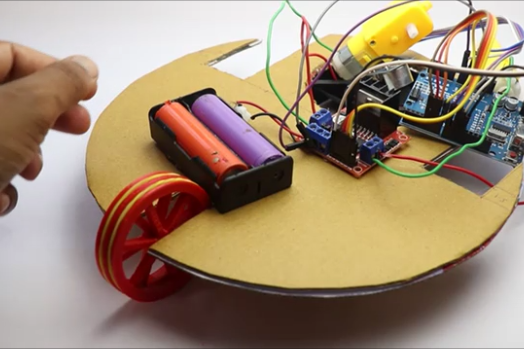
Secure the circuit components firmly to the base to prevent loose connections. Glue the electronics first, then attach the BO motors and wheels using hot glue. Ensure the glue isn’t too hot to avoid deforming the motor frame. Secure the power source with zip ties.
Step 5: Suction Cylinder
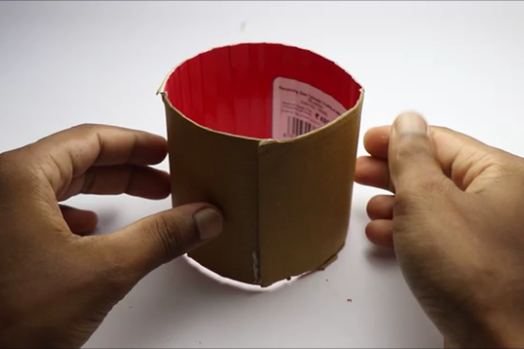
The suction cylinder collects lightweight objects. The powerful DC fan lifts the debris, and a plastic mesh filters and contains it, allowing air to flow freely. Construct the cylinder with cardboard, sealing one end with the mesh and gluing the other end to the frame.
Step 6: Finishing and Testing
Ensure all components are securely attached to the frame. Connect the battery, turn on the fan and main circuit switches, and test the robot. Place light objects like paper bits or foam pieces in its path to see the robot in action.
Conclusion
The project should now be fully operational. Remember, this robot is designed to pick up only lightweight objects and is not suitable for liquids or larger items.
Explore more engaging projects and enhance your coding skills with our specialized courses:
- Python for Kids Course: A beginner-friendly introduction to Python programming.
- Java Course: Comprehensive lessons on Java programming.
- AI Discovery Course: Learn the fundamentals of AI and its applications.
- AI Evolution Course: Understand the progression of AI technologies.