Overview
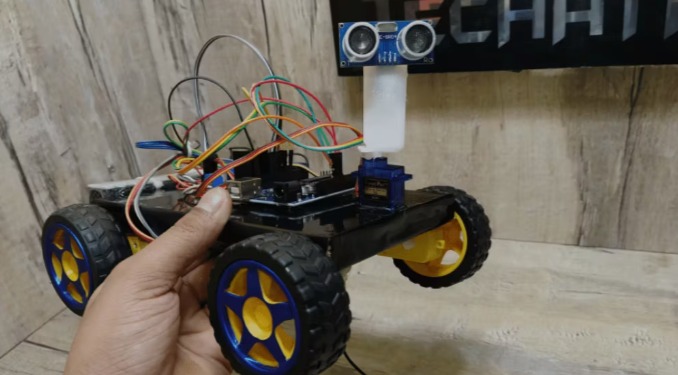
This project is about obstacle avoiding robot in this robot it will calculate the distance from the obstacles and make it move forward, backward, right and left.
In this obstacle avoiding robot if the ultrasonic sensor senses any obstacle it will give input to the hobby generator and it will move accordingly. If the slide switch is OFF then the motor will not work.
Hardware required
- Arduino Uno R3
- Jumper Wires
- L293D
- Hobby generator
- Slide Switch
- Ultrasonic Sensor
Schematic Diagram
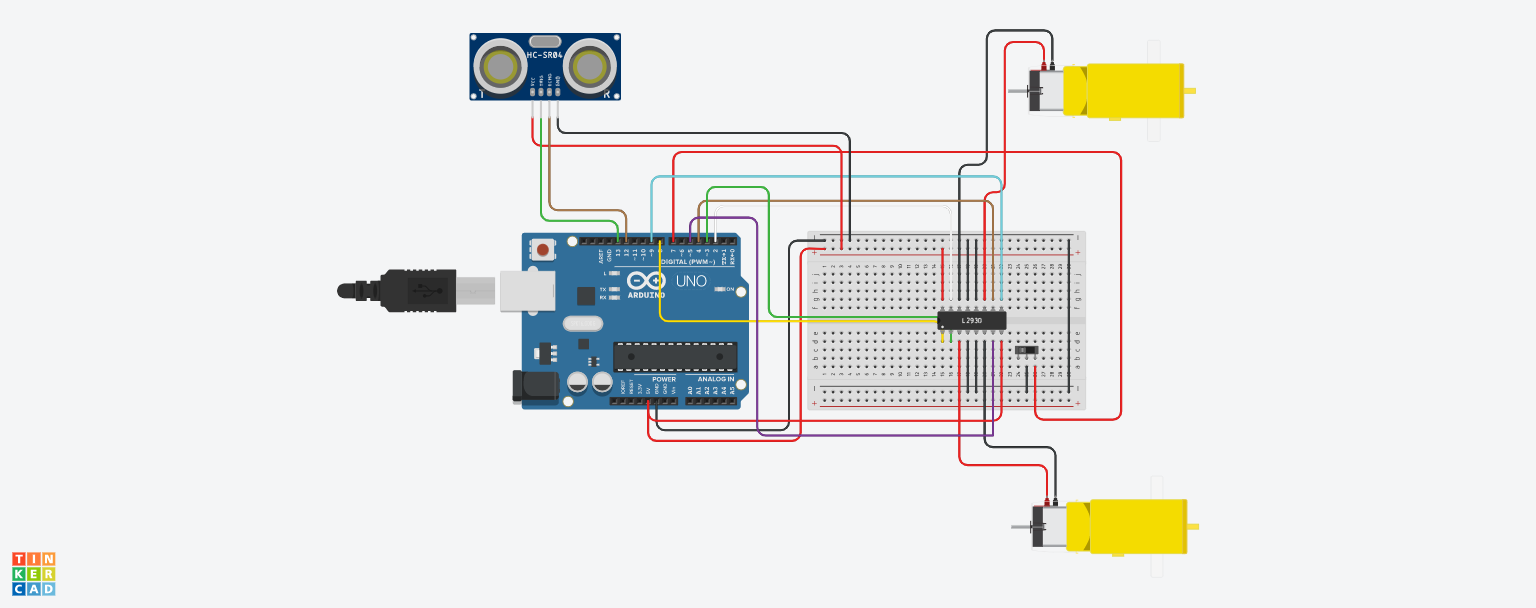
Fig 1. Circuit Diagram
Arduino Code :
const int trigPin=13;
const int echoPin=12;
int enableA=8;
const int motorPin1=3;
const int motorPin2=5;

int enableB=9;
const int motorPin3=4;
const int motorPin4=2;
const int slideSwitch=7;

int duration;
int distance;

void setup()
{
  pinMode(enableA,OUTPUT);
  pinMode(enableB,OUTPUT);

  pinMode(motorPin1,OUTPUT);
  pinMode(motorPin2,OUTPUT);
  pinMode(motorPin3,OUTPUT);
  pinMode(motorPin4,OUTPUT);

  pinMode(trigPin,OUTPUT);

  pinMode(echoPin,INPUT);
  pinMode(slideSwitch,INPUT_PULLUP);

  analogWrite(enableA, 200);

  analogWrite(enableB, 200);
  Serial.begin(9600);
}

void loop()
{

  if(digitalRead(slideSwitch) == LOW){
    findDistance();

    if(distance<=10){
      //The robot will stop for a while
      rightMotor(0);
      leftMotor(0);
      delay(200);
      //The robot will move backward
      rightMotor(-255);
      leftMotor(-255);
      delay(300);
      //The robot will turn towards the right
      rightMotor(255);
      leftMotor(-255);
      delay(200);
    }
    else{
      //The robot will move forwards
      rightMotor(255);
      leftMotor(255);
    }
  }
  //Since the Slide Switch is off, the robot will not move
  else{
    rightMotor(0);
    leftMotor(0);
  }

}
void rightMotor(int speed)
{
  analogWrite(enableB,speed);
  if(speed>0){
    digitalWrite(motorPin3,HIGH);
    digitalWrite(motorPin4,LOW);
  }
  else if(speed<0){
    digitalWrite(motorPin3,LOW);
    digitalWrite(motorPin4,HIGH);
  }
  else{
    digitalWrite(motorPin3,LOW);
    digitalWrite(motorPin4,LOW);
  }
}
void leftMotor(int speed)
{
  analogWrite(enableA,speed);
  if(speed>0){
    digitalWrite(motorPin1,HIGH);
    digitalWrite(motorPin2,LOW);
  }
  else if(speed<0){
     digitalWrite(motorPin1,LOW);
    digitalWrite(motorPin2,HIGH);
  }
  else{
    digitalWrite(motorPin1,LOW);
    digitalWrite(motorPin2,LOW);
  }
}

void findDistance(){
  digitalWrite(trigPin,LOW);
  delayMicroseconds(2);

  digitalWrite(trigPin,HIGH);
  delayMicroseconds(10);

  duration=pulseIn(echoPin,HIGH);
  distance=duration*0.0345/2;
  Serial.println(distance);
}
Precautions
- Connections should be done properly.
- Arduino is case Sensitive so code accordingly.
- Give different and appropriate colours to the wires.