Remote Control Car with Arduino for kids
Overview
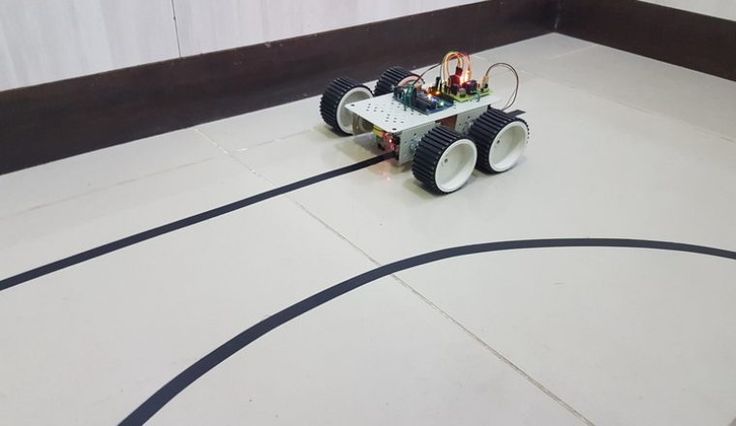
This project is a remote control car or robot which will move according to the instructions given through the remote using an IR sensor. This car can move forward, backwards, right and left according to the button pressed.
In this car is told to move forward. This car can also control its speed, meaning if we want to increase or decrease the speed of the car, we can do the same.
Hardware required
- Arduino Uno R3
- Resistor
- Jumper Wires
- IR Sensor
- Breadboard
- DC Motor
- Remote
- L293D
- Lcd
Schematic Diagram

Fig 1. Circuit Diagram
Arduino Code :
#include <IRremote.h>


IRrecv rc(11);
decode_results results;


const int PWM_M1 = 5;
const int IN1_M1 = 2;
const int IN2_M1 = 3;

const int PWM_M2 = 6;
const int IN1_M2 = 8;
const int IN2_M2 = 9;

int speed = 100;

void setup(){
  Serial.begin(9600);
  rc.enableIRIn();

  pinMode(PWM_M1,OUTPUT);
  pinMode(PWM_M2,OUTPUT);

  pinMode(IN1_M1,OUTPUT);
  pinMode(IN2_M1,OUTPUT);

  pinMode(IN1_M2,OUTPUT);
  pinMode(IN2_M2,OUTPUT);
}


void loop(){
  if (rc.decode(&results)){


    	switch(results.value){
          case 0xFD00FF:                                                                                        //power
          break;
          case 0xFD807F:                                                                                            //vol+
          	forward();
          break;
          case 0xFD40BF:                                                                                 //func/stop
          break;
          case 0xFD20DF:                                                                                              //|<<
          	turnLeft();
          break;
          case 0xFDA05F:                                                                                               //>||
          	stop();
          break ;
          case 0xFD609F:                                                                                              //>>|
           turnRight();
          break ;
          case 0xFD10EF:                                                                             //down arrow
          	speedDown();
          break ;
          case 0xFD906F:                                                                                             //vol-
          	backward();
          break ;
          case 0xFD50AF:                                                                                  //up arrow
          	speedUp();
          break ;


        }
       rc.resume();
  }
}


void forward(){
  Serial.println("forward");
  analogWrite(PWM_M1, speed);
  analogWrite(PWM_M2, speed);

  digitalWrite(IN1_M1, HIGH);
  digitalWrite(IN2_M1, LOW);

  digitalWrite(IN1_M2, HIGH);
  digitalWrite(IN2_M2, LOW);
}

void backward(){
  Serial.println("backward");
  analogWrite(PWM_M1, speed);
  analogWrite(PWM_M2, speed);

  digitalWrite(IN1_M1, LOW);
  digitalWrite(IN2_M1, HIGH);

  digitalWrite(IN1_M2, LOW);
  digitalWrite(IN2_M2, HIGH);
}

void turnLeft(){
  Serial.println("turnLeft");
  analogWrite(PWM_M1, 0);
  analogWrite(PWM_M2, speed);

  digitalWrite(IN1_M1, HIGH);
  digitalWrite(IN2_M1, LOW);

  digitalWrite(IN1_M2, HIGH);
  digitalWrite(IN2_M2, LOW);
}

void turnRight(){
  Serial.println("turnRight");
  analogWrite(PWM_M1, speed);
  analogWrite(PWM_M2, 0);

  digitalWrite(IN1_M1, HIGH);
  digitalWrite(IN2_M1, LOW);

  digitalWrite(IN1_M2, HIGH);
  digitalWrite(IN2_M2, LOW);
}

void stop(){
  Serial.println("stop");
  digitalWrite(IN1_M1, LOW);
  digitalWrite(IN2_M1, LOW);

  digitalWrite(IN1_M2, LOW);
  digitalWrite(IN2_M2, LOW);
}

void speedUp(){
  Serial.println("speedUp");
  speed+=10;
  if(speed>255) speed =255;
  analogWrite(PWM_M1, speed);
  analogWrite(PWM_M2, speed);
}

void speedDown(){
  Serial.println("speedDown");
  speed-=10;
  if(speed<0) speed =0;
  analogWrite(PWM_M1, speed);
  analogWrite(PWM_M2, speed);
}
Precautions
- Connections should be done properly.
- Arduino is case Sensitive, so code accordingly.
- Give different and appropriate colours to the wires.
Conclusion with Maker’s Muse
The Arduino IR Remote Control Car project is a fantastic way to dive into robotics and automation while learning how sensors, motors, and microcontrollers interact. By experimenting with direction and speed control, makers can see how real-world robots function.
Guided by the maker’s muse, such projects fuel curiosity, hands-on learning, and innovation. Once you’ve mastered IR control, explore more sensor-driven creations like this Light Sensor with Arduino in Tinkercad, and keep pushing your creativity to design smarter, interactive systems.