
We are going to learn how to make an age calculator in MIT App Inventor. It is a really easy project to make and understand.
MIT AI has something called a DatePicker which we will be using in this app.
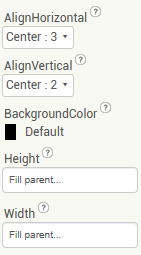
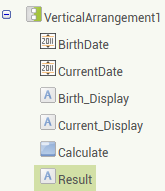
First, we add in a Vertical Arrangement layout from Layout Palette. Set its Height and Width to FillParent, and AlignVertical and AlignHorizontal to Center.
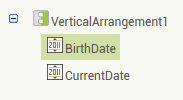
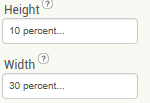
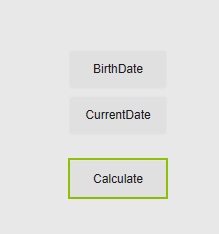
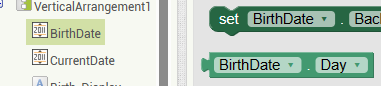
Choose 2 DatePickers from User Interface Palette. We need the user to choose their birth date and the current date to calculate their age. So we rename the first DatePicker to “BirthDate” and the second to “CurrentDate”. Change their texts to the same. Set their Height to 10 percent and Width to 30 percent.

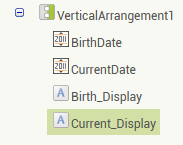
Now we need to display these dates. We pick 2 Labels to do that. Label1 will display the Birthdate and Label2 will show the Currentdate. Rename them accordingly and keep their texts blank.
Now we need a Calculate button so we put in a Button from User Interface, rename and change its text to “Calculate”. Set its height and width to the same dimensions as the DatePickers.
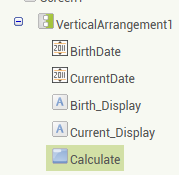
We add one more Label to display the results. Rename it and keep text blank.
We are done with the Design. We move to coding Blocks.
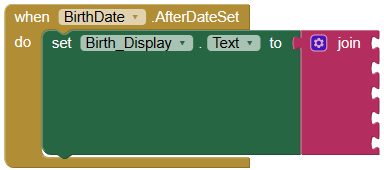
Since we want the labels to display the dates, we use “when DatePicker.AfterDateSet” from the DatePicker blocks for both DatePickers.
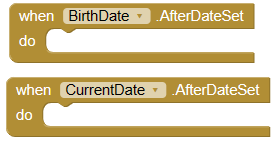
For birth date, we join a “set Birth_Display.Text to” block from BirthDate blocks. Also put in a “join” block from Text since we want to display multiple texts together in one Label. There should be 5 empty spaces in the “join” block.
For alternate empty spaces we put in “BirthDate.Day”, “BirthDate.Month” and “BirthDate.Year” blocks from BirthDate blocks.
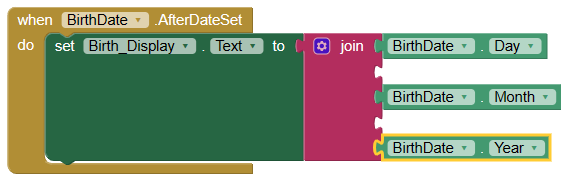
In the rest of the empty spaces, we join the empty text blocks and fill it with “-” hyphen symbol.

This will display the BirthDate in the format of “DD-MM-YYYY”.
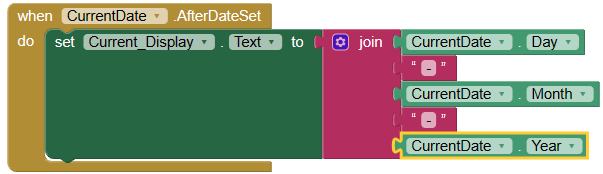
Similarly, we code the CurrentDate block too.
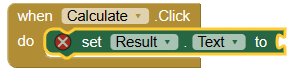
Now all thats left is to code the Calculate Button.
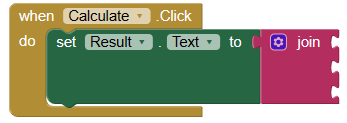
For that, we choose the “when Calculate.Click” block and add the “set Result.Text to” block from Result label.
Now our logic for calculating the age is subtracting the birthdate from the currentdate. And we want the result to have the year and month. So we add a “join” block. And put in 3 empty spaces.
For the first and third empty spaces, we put in subtract blocks from Math. And the second empty space should be empty text block with hyphen “-”.
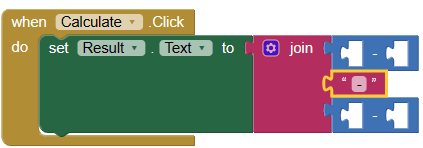
Now for the first empty space in the first join space, we put in “CurrentDate.Month” and “BirthDate.Month” for the second empty space.

Same for the second subtract block except we put in “CurrentDate.Year” and “BirthDate.Year”.

This will display the result in our Result label. And voila! We have our Age Calculator app.