Our objective in this game is to control a monkey and make it catch the incoming bananas.
The first step for that is to create the environment and the monkey.
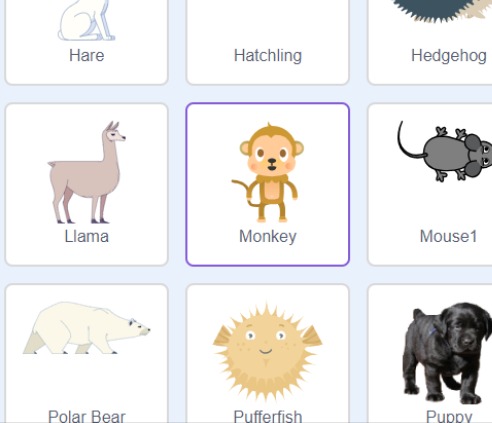
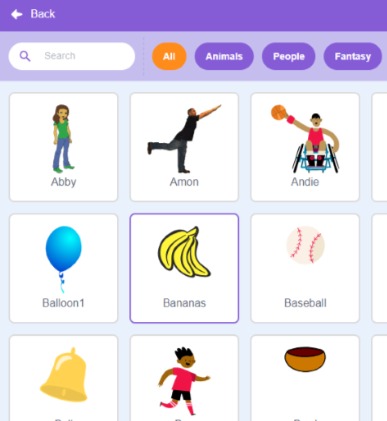
So we add in our sprites/characters, such as monkey and banana.
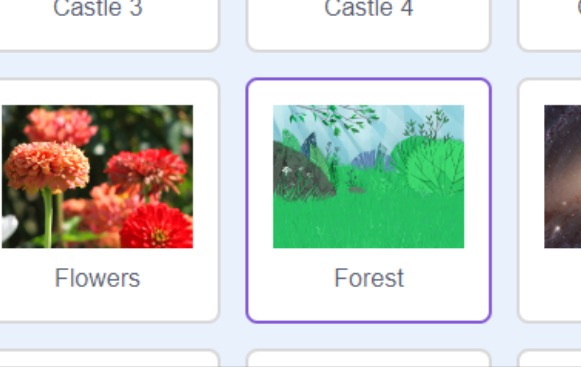
Next, we set our background of “forest”.
We have our basic components needed, monkey, banana, and background.
Now the way this game will work is that the bananas will move from left to right at any height while the monkey tries to catch them. If the banana touches the monkey, the score will increase by 1 but if the banana touches the end of the forest on the right, the score will decrease by 1.
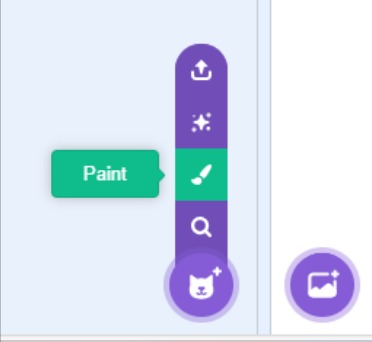
So to know when the banana touches the edge, we need to make a barrier. This barrier will be made by clicking on sprite options and choosing “paint”.
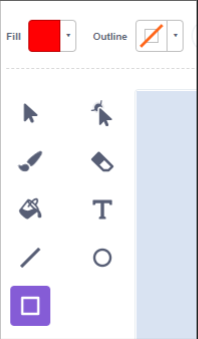
Choose the rectangle option and draw the barrier as shown and rename it to “barrier”.

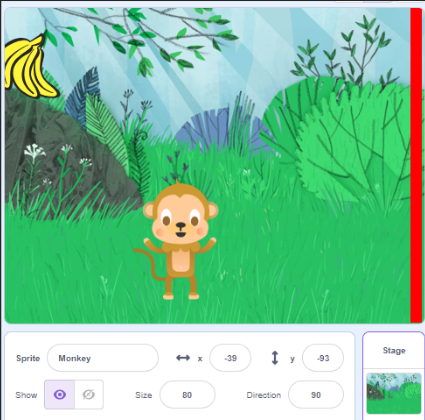
Arrange your sprites as shown and reduce the size of your monkey to 80.
The next thing is to make the monkey move according to our movements.
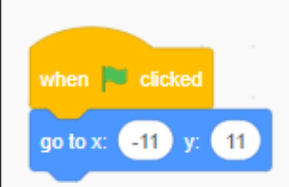
We want the movement control to start when the green flag is clicked so we add in the “when green flag clicked” block. “go to x:_ y:_” block sets our starting point of the monkey.
Once the starting position is set, we wait 1 second before allowing movement control. This is done by adding the “wait 1 second” block and a “go to mouse-pointer” block. And since we want the movement control to last throughout the game, we put the “go to mouse-pointer” block inside a “forever” block.
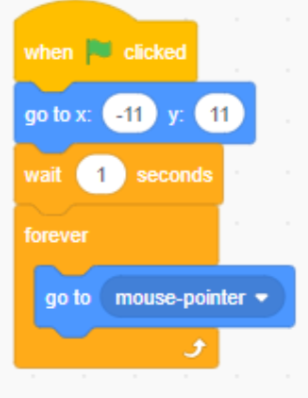
This is the code block for our monkey.
Now we move on to the banana.
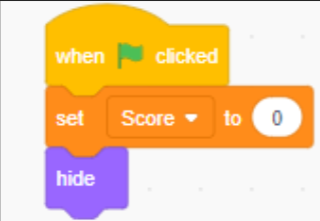
First, we make a variable Score. Add a “when green flag clicked” block and a “set score to 0” block. We hide this for the moment using the “hide” block from Looks to hide the original banana sprite.
Second comes our logic for the banana. Instead of making duplicates of the bananas, what we are going to do is make clones of the banana at runtime. To do that, we use a “forever” block to keep the clones forming continuously and put a “create clone of myself” block from Control. And since we want a bit of space between the clones, we also add in a “wait 1 second” block.
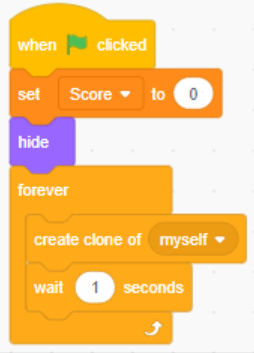
This is our code for cloning. Now we code the actions of the clones. We will have 2 sets of codes. One set will define the movements of the clones and the other will determine via conditions what changes need to be made to the score.
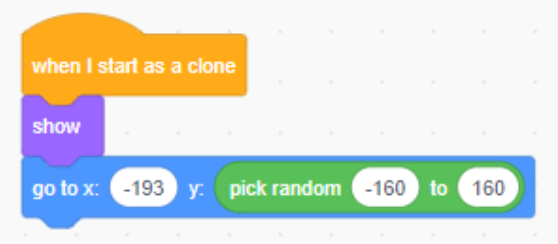
Clone movement code will require a “when I start as a clone” block from Control. We make the clone visible by using a “show” block and setting the start position of the banana clone with the “go to x: _ y: _”. For the x position we put in “-193” and for the y position, we put in a “pick a random number” block from Operators and put the range as “-160” to “160”.
Once this is done, we add in a “forever” block with a “change x by 6” block inside it to keep the banana clone moving to the right continuously.
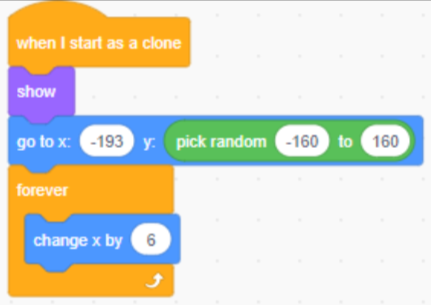
This is one set of codes for clone movement.
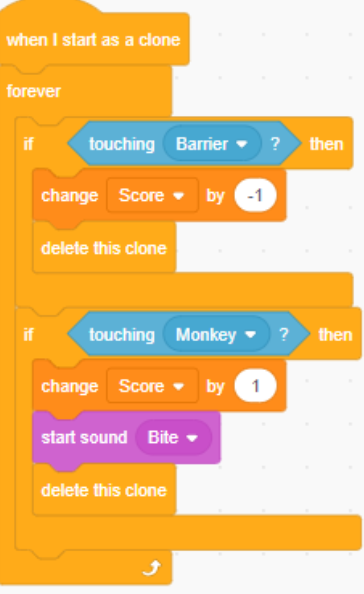
The next set of codes is for score. We take the same “when I start as a clone” and “forever” blocks then we add in two “if __ then” blocks inside them.
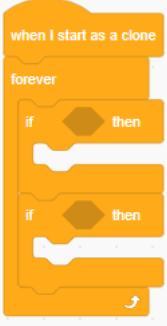
This is our structure for our score conditions. One condition will be to check if the banana clone has touched the barrier and the other will be to check if it has touched the monkey.
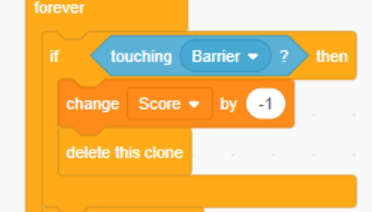
So we put in the “touching barrier” block from Sensing. This checks if the banana clone has touched the barrier. If yes, it should reduce the score by 1. To do that, we add a “change score by -1” block and then we delete the clone using the “delete this clone” block.
Our second condition will be for if the banana clone touches the monkey. So similarly, we put in a “touching monkey” block in the second if condition. We want the score to increase by 1 if it touches the monkey so we add the “change score by 1” block and add a “start sound Bite” Sound block. Then join the “delete this clone” block.
And we’re done making the game!